Posts in Delicious Food
Last Minute Easter Cakes - Macaron Nests

It can't just be me. Anyone else feel like Easter has snuck up on you this year?! I've usually got the house decorated, our Easter makeshift tree decorated with hanging eggs I have collected for years, but this March I am scrambling in the garage and the loft to try and find the box marked "Easter bits" with no luck at all!

I know they are in there somewhere, but I just seem to have run out of time this year, with a busy end of school term full of activities, haring around the country for meetings with my development hat on and getting the house cleared for the plumbers. I had elaborate plans to make some succulent Easter cookies which will now have to become a spring party idea but I wanted to make something quick and easy that will wow the boys over the Easter weekend.

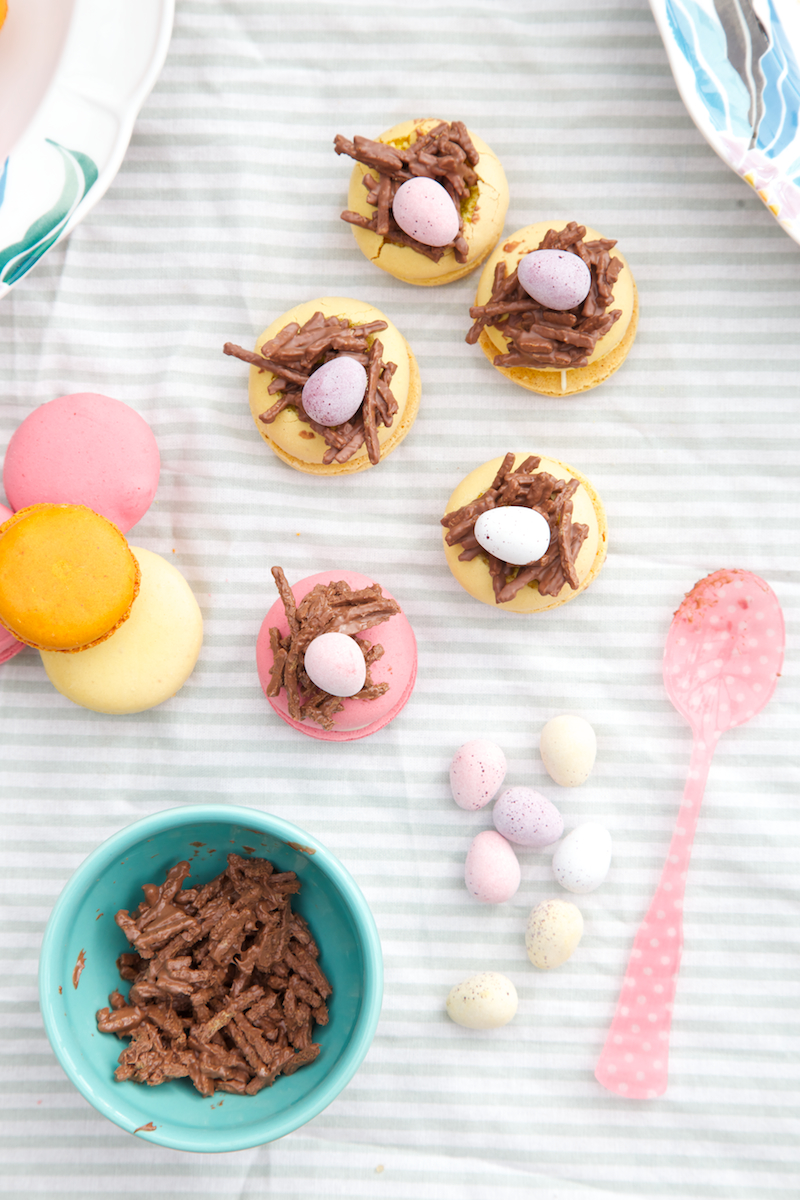
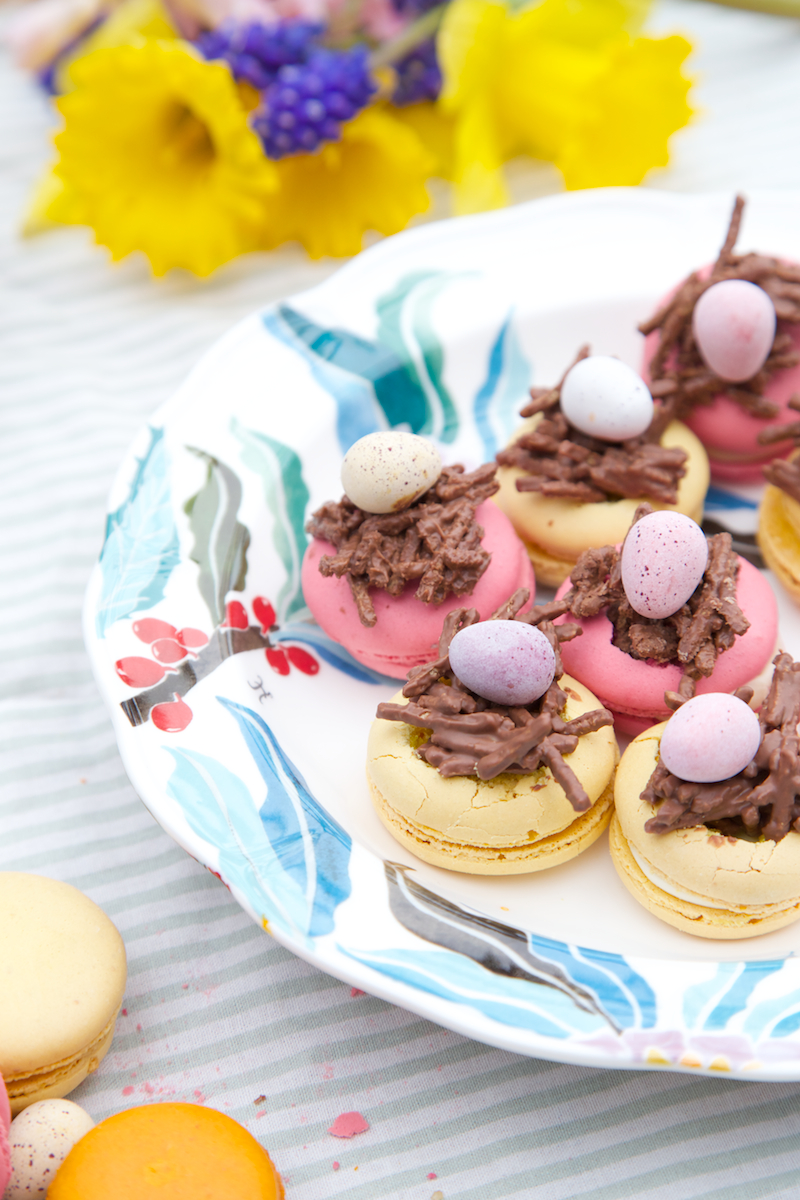
These macaron nests are totally cheating but I say that is A-ok! Sometimes you need to cut a few corners to give you time to actually enjoy all the seasonal celebrations. 

I bought two boxes of macarons - one set from Lidl in their frozen section, yes frozen but AMAZING and a bargain too.

There is almost nothing to do with this "recipe". Simply cut out a circle shape in the top of your macaron, eat the middle (perks of the job) melt some chocolate and mix with fibre shredded cereal for the nest and top with a mini egg!

You could make the macarons yourself of course but this week that is one step too far! TK Maxx do some great packs in their food department, they don't have fresh cream in the middle but I really like their crunchy texture and bought two boxes of the pink and yellow varieties.

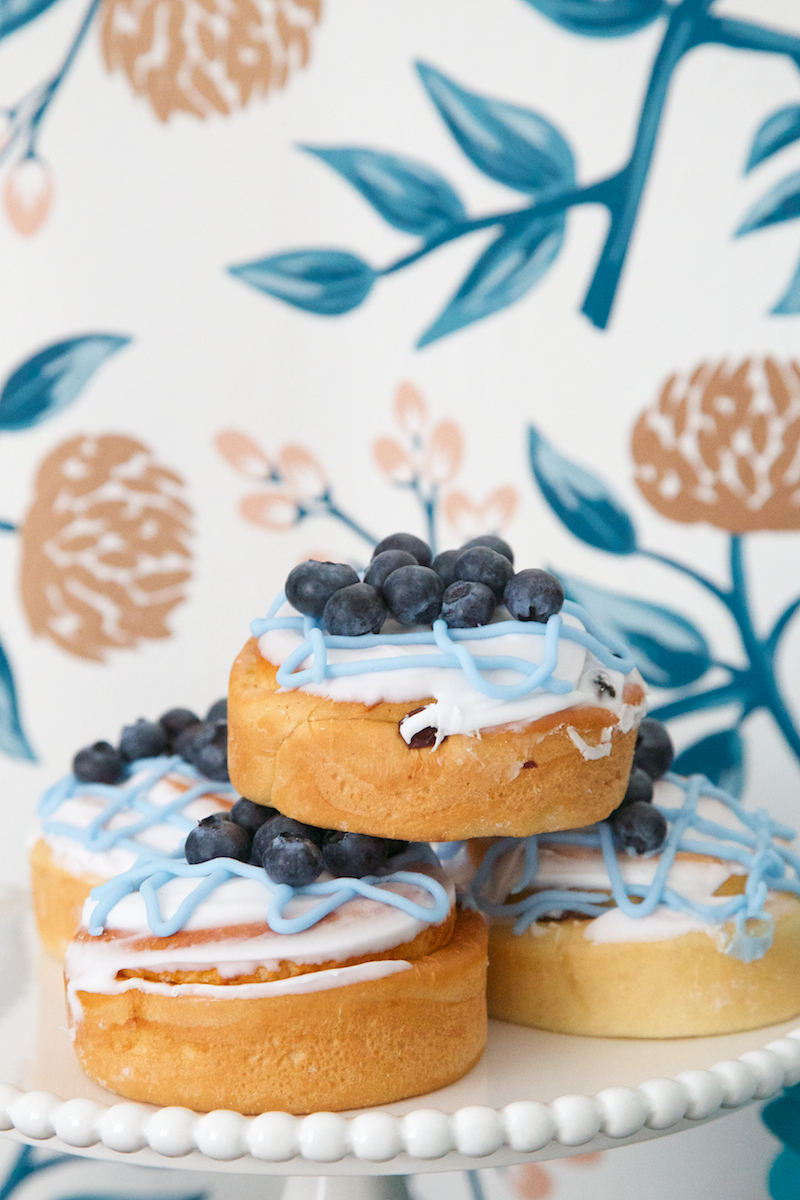
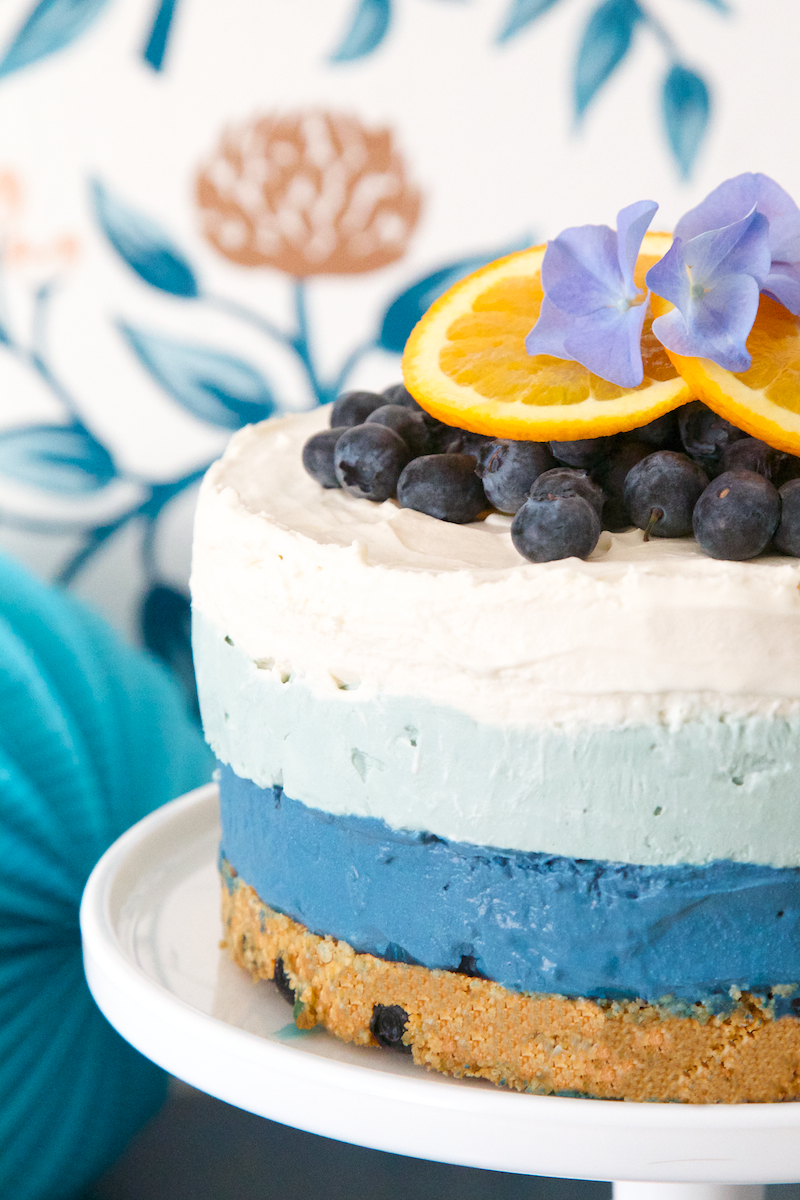
What are your 5 minute cakes ideas, hit me with your suggestions?! Rich loved the grown up chilli crispy cakes I made last year so we might make another batch of them over the weekend. Last year I tried to fool the boys with dyed boiled eggs to look like Cadbury's Creme Eggs but they weren't having any of it! So this year I made an ice cream version!

I'll make sure I get the photos up tomorrow. YUMMY.

First day of the Easter holidays today and we are heading East! Enjoy your count down to the weekend, the chocolate easting and the time with family and friends.

Gluten Free Mother's Day Gifts • Honeybuns Bakery

Some of you will know I work with the very talented people at Honeybuns and shoot their product photography. We had an absolute ball over last summer photographing their second book to be released this year (I am sure not all book shoots are that much fun, laptops in the middle of fields and feasts for lunch after we got the magic snap!) and it really opened my eyes to how yummy gluten free cooking can be.

I am a self declared hopeless baker but with their wonderful afternoon tea hamper even I couldn't go wrong! And just in case I enlisted the help of two mini bakers. One who couldn't stop smelling the mix and one who turned photographer, snapping Sammy and I! 

There's something so gloriously luxurious about receiving a hamper, I have a hundred uses for the basket afterwards and not only do you get a selection of their cake bars in a reusable tin, but you also find the sweetest tea plate and a packet of their gluten free sponge cake mix nestled in the shredded paper. 

I defy anyone to tell me gluten free isn't as tasty or even tastier than a regular sponge. The almond flour and vanilla powder are subtle but make the difference. Topped with anything the boys could get their hands on they were so proud of their masterpiece!

It was so good Rich and I ate it for breakfast this morning! Well elevenses ;)

Check out their fabulous range of goodies to gift to your mummy this year or send a link to your other half as a not so subtle suggestion!

There's something for every budget from a Tinker Tin at £4.99 right up to their super duper deluxe hamper and everything in between. So whether you need to eat gluten free or not have a peek.

Tomorrow is the last day for orders so you still have time for a last minute idea! 

All gluten free and having personally tested alms all of them over the last couple of years I can tell you completely delicious! 

Ombré Cheesecake Recipe

It's no secret that I love birthdays, or any celebration that encourages a buffet table and decorations!

And this year I was determined to make Rich's birthday cake. So the best thing is to go for something simple and easy right? Noooo, let's go for a multi layer ombré cheesecake!

It's actually easier than you think. The trick is to make it in 2 tins.

This is a no bake, no fuss recipe for anyone wanting to try out cheesecake making like me for the first time. There are lots of recipes on the internet but this is mine, cobbled together with a phone call from my mum and the lovely lady at the cake shop near me, who helped me with the icing colours!

Ingredients:

Biscuit base -

  • 1 packet Hobnob biscuits or 300g of the biscuit of your choice.
  • Generous handful of popping candy
  • 50g butter
  • 1 teaspoon golden syrup
  • Handful of blueberries

Per layer - 

  • 500g or roughly 2 tubs cream cheese. I used Philadelphia.
  • Food colouring. I used Sugarflair Paste Colours Navy, Eucalyptus and Grape Violet to add a hint of white for the top layer. 
  • 1 tablespoon orange blossom water
  • 160ml double cream
  • 60g icing sugar

Method:

This is a no bake, no real fuss recipe, all you need is patience. This makes a tall cheesecake so be prepared for a cream cheese feast. 

Biscuit base -

Take your biscuits, break them into quarters and place them in a freezer bag or wrap in cling film. Beat them with a rolling pin until you have a lovely bag of crumbs. Add to a mixing bowl.

Melt your butter and pour into the bowl of biscuit crumbs. Stir together and add your teaspoon of golden syrup. Add your popping candy and mix through.

Take your deep 8 inch cake tin (Make sure it has a removable base so you can push the base upwards when removing your cheesecake layers.) and spread your biscuit mix evenly across the bottom. Sprinkle your blueberries over your base layer and push a few further into the mix. 

Now you need to make your first coloured layer. 

Cheesecake layer -

Empty your cream cheese into a mixing bowl and whisk. You will feel it change consistency to a more fluid texture. Stop whisking. You can use an electric whisk but I just used a hand whisk as I didn't want to over beat it. By hand it took about 4 minutes. 

Add your orange blossom water and stir through.

Now it's time to colour your layer. Using a cocktail stick, dip the end in the colour paste and gentle cut through your mix. Mix thoroughly and keep adding a little more colouring until you are satisfied with the colour. I added approximately half a teaspoon full of the navy for the darkest layer. 

In a separate bowl whisk up your double cream until it becomes a thick consistency. Fold into your cream cheese gently. Keep mixing carefully until all the mix is the same colour. 

Add your sieved icing sugar into the mix and sir through.

Dollop your mix on top of the biscuit layer and use the back of a knife to smooth over the top. 

Now place this first tin, with your bottom two layers in the freezer. I set mine for a couple of hours in the freezer then transferred to the fridge overnight.

I told you, you need patience for this cheesecake!

In your second tin, repeat the cheesecake layer steps freezing the first to set whilst you mix up the final layer.

To get your top layer looking white more than cream, add the tiniest amount of grape violet colouring, again on the end of a cocktail stick to your mix. The violet colour combats the yellow tone.

Place back in the freezer for a couple of hours then transfer to the fridge.

The next day you can put your completed cake together. 

This is the fun bit!

Take your two tins and release the biscuit layer one first. Push gently upwards releasing the tin base. Place on a cake stand.

When you release your second tin place it on top. Smooth your two layers together to avoid any hint that they were made separately! Use a palette knife or folded kitchen roll works well too. I like the slightly rough finish.

Top with blueberries, slices of orange and a few blue hydrangea petals if you have them to hand. if not a dusting of icing sugar would look fabulous. 

Eat and feel stuffed :)

ombre cheesecake recipe 1.jpg

The cheesecake was the centrepiece of a buffet lunch full of Rich's favourites. King prawns to peel to remind him of holidays in Spain, bread from the local bakery, cheese, sticky buns which I added some blue icing to, fancy white chocolates and sugar mice. 

We thoroughly spoilt him on his birthday, we had best friends to stay and the house was full of balloons and decorations from the new Talking Tables Coastal range. Perfect for Daddies with style!

I think the ombré obsession is here to stay. Contemporary and sophisticated mixing rich blues with a turquoise of a Caribbean sea. Heavenly!

The cake matched with the gorgeous fabric bunting, coasters and hanging paper lanterns that I strung up over the dining table. Sometimes I find it hard to find grown up party ware, paper plates that almost feel too nice to use. Style with substance. I love that the cups, plates and napkins come in 2 colour ways. 

For a first attempt I think the colours of the cheesecake were pretty close!

I'm hoping he might make me a pinky version for my birthday out of sponge and decorate with some of the Fluorescent goodies. 

Thank you to Talking Tables for sending me such lovely party ware. Find the full range here.